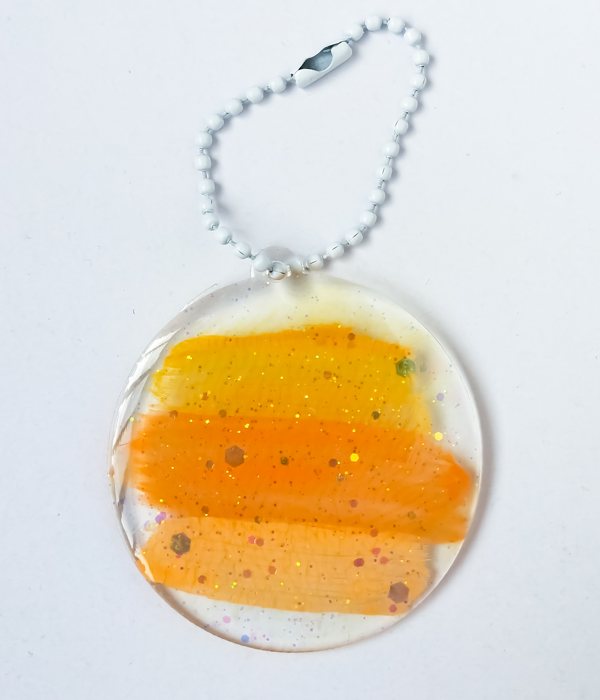
Resin art is one of the most enjoyable uses for epoxy resin. Not only is it a visually attractive form of self-expression, but it also allows you to make something functional at the same time. And one of the best examples of this is by crafting a resin keychain.
Making a resin keychain is a fun and gratifying way to get started with resin crafting. Whether you're an epoxy newcomer hoping to cultivate a new skill or someone with substantial resin experience already, there's a lot to appreciate in the sheer variety and customization afforded by resin keychain projects.
In this article, we'll be explaining what you need to make a resin keychain, as well as how to make a resin keychain, using a step-by-step guide that is beginner-friendly for epoxy novices.
How to Craft Resin Keychains
One of the reasons that resin keychains are a nice place to start is that they don't require much epoxy resin to make. This means if you're learning how to use epoxy, small mistakes won't set you back much, as you can simply try again without feeling like you've wasted a lot of material.
With that said, let's take a look at what supplies you'll need to complete this project.
Crafting Resin Keychains: What You'll Need
The first thing to understand is that resin keychains are highly customizable. This means the supplies you need, beyond the core pieces, can vary greatly. Our first list below contains just the essentials.
Supplies List: Core Items
-
Epoxy Resin: Naturally, this is essential. It's a highly durable plastic that makes up the bulk of the keychain. Our Primaloc Epoxy Resin is exceptional for resin art and craft projects.
-
Disposable Plastic Cups: You'll use these to measure and mix your epoxy batches. When preparing a batch of epoxy, never reuse a previous cup. Always use a new one.
-
Wooden/Plastic Stir Sticks: This is for mixing the epoxy together. Something small is all you'll need for a small project like this.
-
Resin Molds: Keychains can be almost any shape, so the primary factor to keep in mind is how big you want them to be. Choose molds that look nice to you in size and shape.
-
A Heat Gun: A heat gun will allow you to remove air bubbles from the resin after pouring it into your mold. You can get an excellent heat gun from our store.
-
A Keychain Ring (or Ring Set): Keychain rings are attached to the cured epoxy piece near the end of the project to turn them into a keychain proper.
Also, while jump rings are usually included, they aren't always, so if you choose any that don't have one, you can simply buy the jump rings separately.
Note: An eye screw may be needed for thicker resin pieces. If your jump ring won't close, you can use a jump screw of those to make a suitable point to connect to.
- Flat-Nose Pliers: This tool is used for opening/closing the jump rings.
- A Powder Drill: This is used to make a hole for the jump ring. You'll use a bit that matches the size of the ring so it can fit.
Supplies List: Items for Safety and Easy Cleanup
The next few items are for personal safety as well as for keeping your work area protected and clean.
-
Nitrile Gloves: Wearing these will protect your hands from epoxy residue and other substances.
-
An N95 or KN95 Respirator: Though high-quality epoxy lets off mild fumes at best, we still recommend you wear one of these while working with it. For lower-quality brands, this is a must.
- Painters Plastic: Apply this over any surfaces you don't want epoxy on. It may not be necessary in the end, but if a spill or splashing somehow occurs, you'll be glad you have it.
Supplies List: Optional Decorative Items/Materials
The final set of items is optional. Choose what you want from this to customize your resin keychain with colorful tinting, accents, and other decorative elements.
-
Resin Colorants: There are two common types of colorants use for this type of project: Epoxy Powder Pigments and Epoxy Liquid Pigments. Both of these are available in a wide range of colors from our store.
- Embedment Items: This all-purpose term just means anything you'd like to seal within the epoxy resin. It can be glitter, decals, stickers, bit of metal, little pictures, etc. Almost anything that fits is viable, though we recommend against using anything organic, such as food or plants, as they can decay after the fact.
Next up is how to prepare your workspace.
Preparing Your Resin Keychain Work Area
Once you've gathered your supplies, you'll still need to set up a work space. Pick a place that's well ventilated. A table (that doesn't wobble) is a good choice.
Epoxy cures best at about 75°F, so if you can keep your temperatures within 5 degrees of that, you should be good to go. Humidity below 60% is also desirable for better curing.
If you'll be using painters plastic, now's the time to cover your surfaces to prevent messes from accidental spills or other mistakes.
Finally, your resin molds need to be clean. Make sure they don't have dust or other contaminants in them.
Crafting Your Resin Keychain: A Step-by-Step Guide
Now you're ready to craft. Let's begin!
Step #1: Measure and Mix Up a Batch of Epoxy.
You'll start by measuring a batch of epoxy. This will likely be a small batch compared to most epoxy projects, so mix it extra carefully to avoid inducing air. Most typical keychains will require about 1 to 1.5 fl oz of mixed epoxy resin; something bigger will require more, of course.
If you plan to apply embedments, be aware that you'll be doing two smaller layers of epoxy, rather than a single full layer. The first will partially fill the mold and allow you to place embedments on top. The second will then finish filling the mold, thus sealing everything inside.
After you measure out an appropriate amount of resin/hardener, mix it together, according to your chosen epoxy brand's instructions.
Note: You should add any colorants you want to use when you're done or nearly done with the mixing. Start with a very small amount—it's potent—then you can add more as needed to achieve a look that suits your goals.
Step #2: Add Your Resin to the Mold
Next, it's time to add your resin to the mold.
Start by pouring your mixed resin batch into the mold for your keychain. Pour carefully to avoid spillage.
After you've done that, use a heat gun to remove any air bubbles. This won't take but a few moments because the project is so small. Just a couple quick sweeps of the epoxy should remove them. Be sure not to linger in one spot, as you don't want the epoxy to get too hot.
Note: If you're using embedments, the instructions are a little bit different. You'll first pour in the partial fill batch of epoxy resin. From there, you can carefully position any embedments you'd like to seal within your keychain.
Once that's done, use the heat gun to quickly remove any air bubbles, then wait for 4 to 6 hours for the epoxy to partially cure. Once that time has passed, make a second batch to fill the rest of the mold and seal in the embedments.
Step #3: Allow the Epoxy to Finish Curing
The final step is mostly hands-off. Just let the epoxy cure in its mold for 24 to 72 hours. Try to maintain a good climate for it, otherwise it may take longer than necessary.
Once it's done curing, just remove it from the mold.
Step #4: The Finishing Touches
After your resin keychain has cured and been removed from the mold, you can use your drill or your eye screw to create a small hole. Once you've done that, simply clean the resin piece and attach your jump ring/chain.
That's it! Your resin keychain is now complete!
Primaloc Epoxy: Premium Epoxy for Premium Results
When it comes to epoxy resin, Primaloc Epoxy gets the job done. Our epoxy resin is premium-grade, pours easily and smoothly, and cures clear and strong—with high performance in every category, perfect for crafting resin arts and crafts.
Epoxy resin can be beautiful, strong, and long-lasting—which is why you shouldn't compromise on quality. With Primaloc Epoxy Resin, you get the ultimate finish in durability and visual appeal.
Protect your surfaces by giving them a rock-solid epoxy finish. Choose strong. Choose reliable. Choose Primaloc.


