
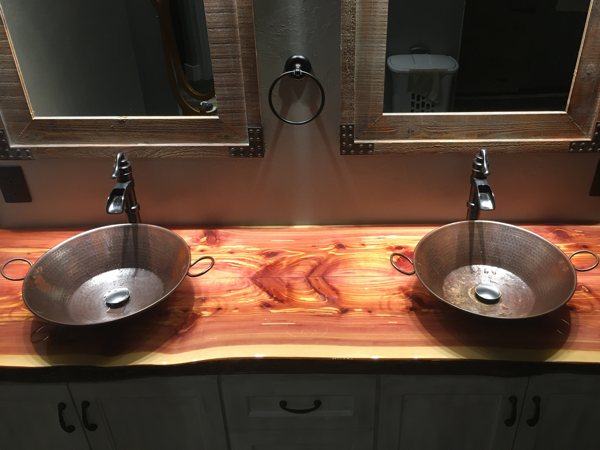
Revitalizing your home decor often involves giving a new lease of life to older countertops, an endeavor that can significantly enhance the aesthetics of that space.
Rather than opting for a complete countertop replacement, there's the time-honored optio of renovating them, preserving their cherished role in your home or business while restoring their appearance. Applying an epoxy resin finish is one of the most effective methods to achieve this transformation, offering a refreshed and modern look while retaining the countertop's original charm.
Epoxy Resin Is an Ideal Refurbishing Option
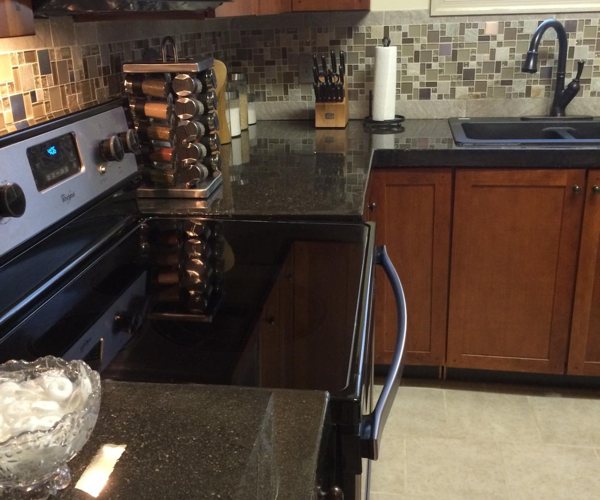
Applying an epoxy resin finish to countertops is a widely acknowledged and contemporary technique that not only protects your surfaces but also maintains their unique visual appeal.
If your current countertops are valuable to you—whether due to their premium material, aesthetic appeal, or personal sentimental worth—choosing to coat them with epoxy may be the perfect option.
Epoxy resin boasts excellent compatibility with a range of countertop materials. Learn more here.
Can You Apply Epoxy Over Older Countertops?
Many wonder if it's feasible to apply epoxy over existing countertops, and the answer is a resounding "Yes, absolutely."
Applying epoxy to older countertops follows the same principles as applying it to new ones, which in turn means it's quite approachable, even for beginners. Read below to discover why the process is not only feasible but also simpler than you might think.
The first step is to ensure your countertops are clean and free of any debris or residues. This preparation is crucial for the epoxy to adhere properly.
Depending on the type of your countertop material, a light sanding might be necessary to create a surface that the epoxy can bond to effectively. Beyond this, the process aligns with the typical steps involved in epoxy application.
To calculate the amount of epoxy you'll need, utilize our Primaloc Epoxy Coverage Chart.
Here's How to Apply Epoxy to Older Countertops
Here's a step-by-step guide to applying epoxy on older countertops:
-
Collect Your Materials: Ensure you have all necessary items, including a high-quality epoxy resin designed for countertops, along with the essential tools and supplies for the application.
-
Prepare Your Workspace: Arrange your workspace to facilitate a good curing environment. Organize your materials so they're readily accessible yet unlikely to be accidentally bumped or knocked over.
-
Apply a Seal Coat: Begin with a thin layer of epoxy resin, brushed on to seal any pores in the countertop, which helps eliminate potential air bubbles. Allow this seal coat to partially cure for 4 to 6 hours.
-
Apply the Flood Coat: Depending on the size of your countertop, you may need to prepare multiple batches of epoxy. It's important to apply each batch sequentially, ensuring they merge well before the epoxy begins to cure.
-
Remove Air Bubbles: Shortly after applying the flood coat, use a heat gun or torch to remove air bubbles. Reinspect the surface ten minutes later to catch any late-forming bubbles and pass over the surface again if necessary.
- Cure the Epoxy: Allow the epoxy to cure for 72 hours under favorable conditions. It's possible to cure outside of the ideal range, but , the curing process might take longer. In such cases, a full week of curing is recommended to ensure optimal results.
Note: Different brands of epoxy might have specific application instructions. If you're using Primaloc Bar & Table Top Epoxy, refer to the detailed instructions available on our support website for the best outcome.

Handy Tips for Getting the Most Out of Your Epoxy
Working with epoxy resin, even as a newcomer, can be a rewarding experience if you follow some key concepts.
Here are some tips to get you started:
-
Read Instructions Carefully: Before you start, thoroughly read and understand the epoxy's instructions. Different epoxy resins may have specific mixing ratios, curing times, and application guidelines.
-
Proper Mixing: Accurately measure the resin and hardener according to the manufacturer's instructions. Mix thoroughly for the recommended time to ensure a proper cure and avoid a sticky finish.
-
Temperature and Humidity Control: Work in an environment where temperature and humidity levels are conducive to epoxy curing. Ideal conditions are typically around 75°F with low humidity.
-
Surface Preparation: Ensure the surface you're working on is clean, dry, and free of oils or dust. Sand glossy or smooth surfaces to provide better adhesion for the epoxy.
-
Eliminate Air Bubbles: After pouring the epoxy, always use a heat gun or torch to gently pass over the surface, which helps pop any air bubbles that have risen to the top.
-
Protect Yourself: Always wear protective gear, including gloves, safety glasses, and a respirator, especially in poorly ventilated areas, to avoid exposure to fumes.
-
Test First: If you're working with a new type of resin or trying a new technique, consider doing a small test first to ensure the results meet your expectations.
-
Layer Thickness: Be aware of the maximum thickness recommended for each pour and abide by it to prevent excessive heat buildup and potential cracking. For instance, our Primaloc Bar & Table Top Epoxy self-levels to 1/8 of an inch thickness.
-
Finishing Touches: Once cured, if the surface requires sanding or polishing, do so carefully to avoid introducing scratches or other imperfections.
- Patience: Epoxy resin projects require patience, both during the application process and the curing phase. Take care not to rush through the phases, as while each phase is relatively straightforward, they're all essential.
Follow these guidelines, and you'll be sure to end up with that iconic epoxy finish!
Primaloc Epoxy: Premium Epoxy for Premium Results
When it comes to epoxy resin, Primaloc Epoxy gets the job done. Our epoxy resin is premium-grade, with high performance in every category, including:
- Unmatched Strength: A Primaloc finish won't buckle, even under high pressure.
- Long-Lasting Resilience: Primaloc epoxy lasts for many years with minimal care, and can endure high-traffic environments with ease.
- A Crystal-Clear Coating: With its pristine, transparent appearance, looking at a cured Primaloc coating is like peering through a window.
Epoxy resin can be beautiful, strong, and long-lasting—which is why you shouldn't compromise on quality. With Primaloc Epoxy Resin, you get the ultimate finish in durability and visual appeal.
Protect your surfaces by giving them a rock-solid epoxy finish. Choose strong. Choose reliable. Choose Primaloc.