Epoxy resin stands out as a highly durable, aesthetically pleasing material, ideal for finishing furniture and fixtures due to its durability, crystal-clear appearance, and versatility. It's particularly favored for table tops, where all of its properties can be utilized to full effect.
One question that we get asked frequently, especially by epoxy newcomers, is, "How many coats should you put on a table top?"
For most epoxy table top projects, there is a general guideline that applies. However, some projects may require more than the norm.
In this Primaloc Answers article, we'll not only provide our detailed answer to that question, to help you determine how many coats you'll need for your table top project, but we'll also explain the situations where more than the usual may be necessary.
How Many Epoxy Coats Should You Put on a Table Top?
Before diving into your epoxy table top project, it's essential to decide on the specific style and functionality you're aiming for.
Are you opting for a classic, no-frills epoxy table top? This choice is popular for its simplicity and effectiveness in showcasing and protecting the natural allure of your substrate with a clear, durable finish.
Perhaps, instead, you're considering an epoxy river table, which can be truly captivating when handled well. Although river tables demand more intricate planning and execution than standard epoxy tops, their stunning visual appeal is often well worth the extra effort.
Embedding objects into the resin or adding tints and colors using epoxy pigments to your epoxy can also influence the number of layers required. While these additions can enhance the uniqueness of your table, they don't always change the overall number of coats needed.
On the other hand, for themed table tops, like an ocean-inspired design, you could start with several tinted partial pours to achieve the desired artistic effect. Once those are done, a final clear, self-leveling epoxy coat is applied to even out the surface and encapsulate your design securely.

What to Be Aware of When Creating an Epoxy Table Top
An epoxy table top project is an exciting endeavor, but if you're relatively new to epoxy projects, there are a few things worth knowing before diving in.
First is the epoxy process. Typically, an epoxy project progresses through a series of essential phases. These are:
- The Seal Coat Phase—This phase involves brushing on a seal coat to seal porous substrate surfaces.
- Measuring/Mixing—In this phase, you'll measure your epoxy batch, then mix it thoroughly.
- The Flood Coating Phase—The main pouring phase. This is where you'll apply a comprehensive coating to your substrate. One is usually enough.
- Air Bubble Removal and Curing Phase—Removing air bubbles after a pour is crucial for a crystal-clear finish. Curing comes right after that and is mostly hands-off, requiring only that you maintain ideal environmental conditions.
Each of these phases are relatively straightforward to perform, but definitely need to be handled properly.
Next, we'll delve into the specifics of how each type of table top project influences the number and application of epoxy coats.
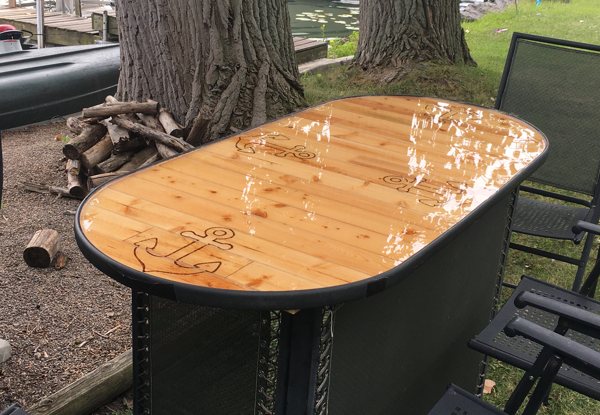
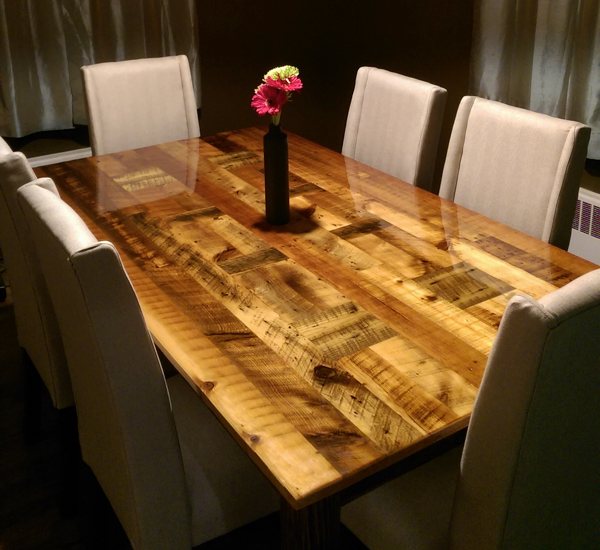
Table Top #1: A Standard Epoxy Table Top
Typically, a high-quality epoxy table top project requires just two steps: a seal coat followed by a single flood coat. If you're working with a premium table top epoxy like our Primaloc Bar & Table Top Epoxy, one layer should be sufficient.
Our Primaloc epoxy levels out to a thickness of 1/8 inch, providing a robust protective layer that effectively preserves your table top. When correctly applied, this finish is designed to endure at least seven years of regular usage.
Should the surface ever require rejuvenation, it's quite straightforward to do so. Simply sanding the surface lightly and applying an additional layer of epoxy will renew its appearance, ensuring your table top continues to look pristine and well-protected.
Coating Summary: For a Standard Epoxy Table Top, Aim for:
- A seal coat of epoxy—these require far less resin than flood coats.
- A comprehensive flood coat layer—Use a high-quality epoxy like our Primaloc Bar & Table Top Epoxy for optimal, long-lasting results and a low-maintenance finish.
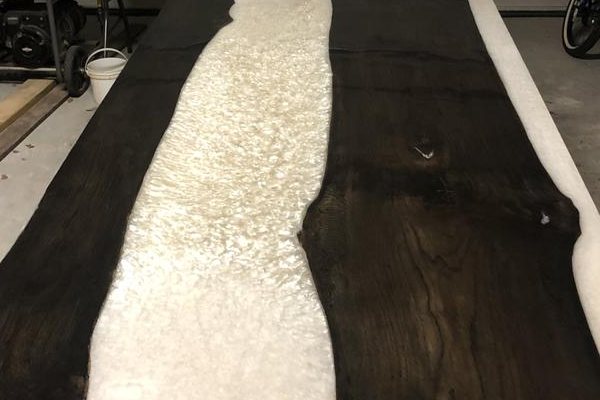
Table Top #2: An Epoxy River Table
Creating an epoxy river table typically involves a series of coats, with at least two being essential for most projects.
The first coating we recommend is the seal coat, a crucial step in any epoxy resin project. This thin layer is brushed onto the substrate to seal pores and minor gaps, preventing air from surfacing as bubbles in the final finish. It acts as a preparatory layer that ensures the substrate is airtight and ready for further epoxy application.
Following the seal coat is the river coat, which often features tinted epoxy using dyes or mica powder pigments to create the distinctive "river" effect, though clear epoxy is also an option depending on the desired aesthetic. For deeper rivers, you might need to apply this coat in two stages to allow each layer to properly release any trapped air and settle.
The final essential step is the flood coat, applied over the entire table top, thus encompassing both the river vein and the sealed substrate. This coat provides comprehensive protection and a level surface, enhancing the visual depth and clarity of the river feature as well as safeguarding the substrate below.
Each layer serves a distinct purpose, from sealing and preventing bubbles to adding aesthetic value and offering protection, culminating in a beautifully finished river table.
For a clean, clear finish, we highly recommend you spring for a premium-grade epoxy, such as our Primaloc Bar & Table Top Epoxy. This will ensure a long-lasting outcome without the inherent blemishes and imperfections incurred by low-cost "budget brand" epoxies.
New to epoxy? Learn how to get a perfect pour with your epoxy in our beginner's guide here!
Coating Summary: For an Epoxy River Table, Aim for:
- A seal coat of epoxy—these brushed-on coats use far less resin than flood coats.
- An epoxy river vein—This typically involves pouring epoxy into a prepared space for the epoxy "river" element of your project. To facilitate air bubble mitigation and proper curing, it may require multiple individual layers depending on the desired depth.
- A comprehensive flood coat layer—This is your topcoat for the project. It's there to preserve not only your substrate but also add depth to the river vein, further enhancing the effect. Our Primaloc Bar & Table Top Epoxy is perfect for this
Table Top #3: Themed Tables and Tables with Embedments
The approach to creating a table top that incorporates embedments, pigments, or a specific theme can differ significantly based on the project's details.
For table tops that incorporate pigments, dyes, or minor embedments like paper keepsakes, typically, a single flood coat of our Primaloc Table Top Epoxy on top of the initial seal coat is adequate.
However, when dealing with larger embedments, such as figurines or marbles, or aiming for a complex thematic design like an ocean-themed table, the process might require several layers to achieve the desired depth and effect.
To attain a more substantial finish that accommodates larger embedded items or intricate artistic themes, you can apply multiple layers of our Primaloc Table Top Epoxy, building up to the necessary thickness while ensuring clarity and protection for your design.
Coating Summary: For an Epoxy Table with Themes or Embedments, Aim for:
- Conventional finishes with thin embedments—A singular seal coat and flood coat should be perfect.
- Conventional finishes with thick embedments—A seal coat followed potentially by multiple flood coat layers, allowing for partial curing time between each, is typically the way to go.
- A complex finish (e.g., themed table top)—A seal coat, followed by various partial coatings or full flood coatings as needed. Partial coatings may involve different tints to produce certain effects or just be a means to introduce depth to the project.
Primaloc Epoxy: Premium Epoxy for Premium Results
When it comes to epoxy resin, Primaloc Epoxy gets the job done. Our epoxy resin is premium-grade, with high performance in every category, including:
- Unmatched Strength: A Primaloc finish won't buckle, even under high pressure.
- Long-Lasting Resilience: Primaloc epoxy lasts for many years with minimal care, and can endure high-traffic environments with ease.
- A Crystal-Clear Coating: With its pristine, transparent appearance, looking at a cured Primaloc coating is like peering through a window.
Epoxy resin can be beautiful, strong, and long-lasting—which is why you shouldn't compromise on quality. With Primaloc Epoxy Resin, you get the ultimate finish in durability and visual appeal.
Protect your surfaces by giving them a rock-solid epoxy finish. Choose strong. Choose reliable. Choose Primaloc.